 Pin It
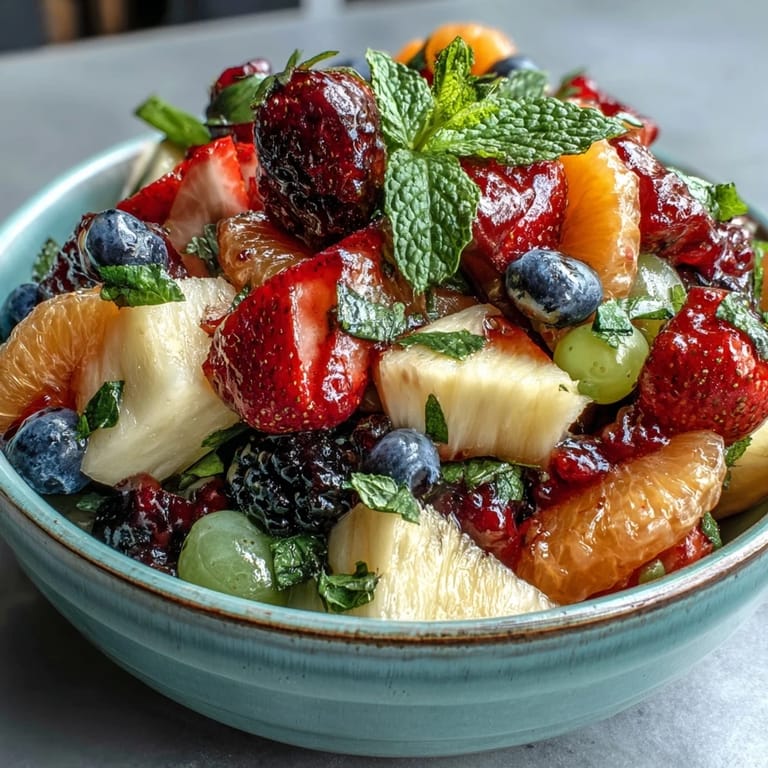
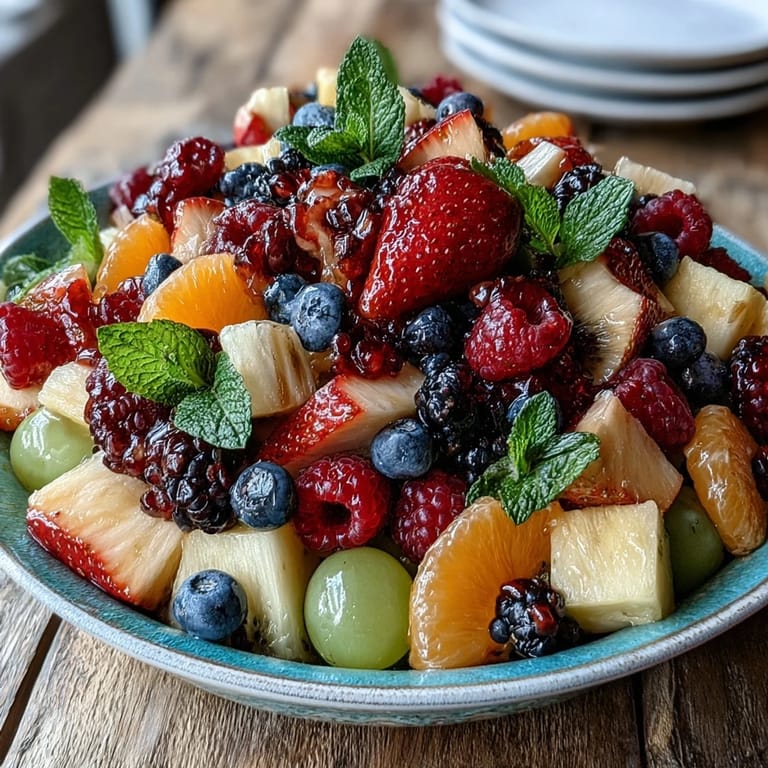
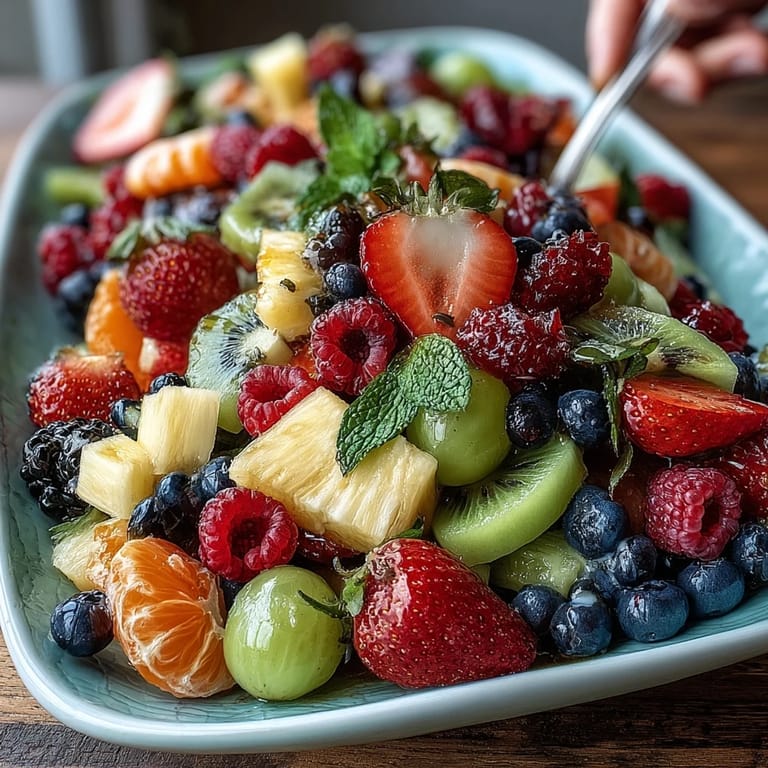
 My cousin texted me three days before her graduation asking if I could bring something that didn't require heating up in someone's kitchen. She wanted the dessert table to feel special, not just a pile of grocery store cake. That afternoon, wandering through the farmers market with my basket, I realized the answer was right in front of me—jewel-toned fruit arranged like edible art, with delicate flowers tucked between the berries. The whole thing came together as this gorgeous, no-stress centerpiece that made people stop talking just to admire it.
What stuck with me most wasn't the setup—it was watching people's faces light up when they realized the flowers were actually edible. One guest plucked a purple viola straight from the display and tasted it, surprised by this delicate, almost peppery flavor she'd never experienced before. That simple moment turned the fruit table into a conversation starter, and suddenly everyone was experimenting, trying different flower combinations with their bites of melon.
Ingredients
- Seedless green grapes: These stay crisp longer than seeded varieties and add a subtle tartness that balances sweeter fruits.
- Seedless red or black grapes: The darker grapes photograph beautifully and offer deeper flavor; I learned to keep them in the coldest part of the fridge until the last minute so they stay firm.
- Strawberries: Hull them just before the event—cut strawberries weep if they sit too long, making the table look tired instead of fresh.
- Pineapple: Cut away the core and trim the skin thoroughly; rough edges catch light and make the whole display look sloppy.
- Watermelon: A melon baller creates elegant spheres that roll beautifully across the arrangement, or cut into wedges for a bolder look.
- Cantaloupe: The golden color is essential for contrast; use a melon baller to create consistent, pretty shapes that nestle between berries.
- Blueberries: Pat these completely dry—any moisture causes them to roll unpredictably across the table like tiny escape artists.
- Raspberries: Add these last since they bruise from handling, and they're delicate enough that guests should eat them first.
- Kiwis: Slice thin to show off the bright green interior; this fruit adds unexpected color that ties everything together.
- Oranges: Segment them by hand rather than chopping—the natural pieces hold together better and look intentional.
- Edible flowers: This is non-negotiable: only use certified food-grade flowers that were never exposed to pesticides, fungicides, or florist chemicals; violas and pansies are sturdy and pretty, nasturtiums taste peppery, and borage flowers look like tiny stars.
- Fresh mint leaves: Use these to fill gaps and add freshness; they stay perky longer than flowers if kept cool.
- Lemon slices: Optional but they prevent browning and add visual brightness; include them if you want the display to last through a longer event.
Tired of Takeout? 🥡
Get 10 meals you can make faster than delivery arrives. Seriously.
One email. No spam. Unsubscribe anytime.
Instructions
- Wash everything, then dry completely:
- Wet fruit slides around and looks sloppy on the table, plus the moisture makes flowers wilt faster. I use a clean kitchen towel for grapes and berries, being gentle so nothing bruises.
- Cut with intention:
- Size matters more than you'd think—pieces should be big enough to grab easily but small enough that they don't dominate the display. A melon baller changed my life because it creates these perfect little orbs that look deliberate.
- Start with a map in your head:
- Decide if you want sections of color or a mixed rainbow pattern before you place the first piece. I usually work outward from the center, laying down the sturdiest fruits first (grapes, melon) as anchors.
- Layer and overlap for abundance:
- Let fruits cascade over each other rather than lying flat and separate. This creates depth and makes the table feel generous, not sparse.
- Tuck flowers and mint in the gaps:
- This is where personality happens—flowers shouldn't look glued on but rather like they grew up between the berries. Step back and look for holes, then fill them with color and greenery.
- Add lemon slices last if using:
- Arrange them in a scattered, random way so they feel like decoration, not an organizational system. A few slices around the edges adds brightness without overwhelming the display.
- Keep it chilled until go-time:
- Arrange everything in a cool garage or basement if possible, then transport on a flat surface. Set it out no more than 30 minutes before guests arrive to keep everything at peak freshness and firmness.
 Pin It
 Two hours into the party, the table was half-gone, but what really got me was how many people came back for seconds not because they were still hungry but because they wanted to try a different flower combination they'd been thinking about. Food that makes people curious, that sparks conversation about flavors and beauty—that's when you know you've created something worth the effort, even if the effort was just thoughtful arrangement.
Why This Works for Celebrations
Fruit tables solve the problem that plagues party hosts: how to feed a crowd without spending your entire budget or disappearing into the kitchen. Everything is ready before guests arrive, nothing needs reheating, and it actually looks more impressive than plated desserts because it has this natural, overflowing generosity. People feel healthier eating it too, which means they enjoy themselves more and stay longer.
Seasonal Swaps and Variations
The beauty of this display is that it follows the seasons naturally. In summer, lean into berries and stone fruits. Spring calls for bright citrus and tender greens. Fall is your moment for deeper reds and mangoes. Winter works surprisingly well with pomegranate seeds, persimmons, and those jewel-toned grapes. I've found that planning around what's actually in season means better flavor, better prices, and produce that stays firm longer because it hasn't traveled cross-country.
Small Details That Change Everything
The secret to a show-stopping fruit table is understanding that it's not about having the most fruit—it's about how you compose it. Odd numbers of colors create better visual rhythm than symmetrical patterns. Varying heights and textures keeps the eye moving. And honestly, generous spacing makes it feel luxurious instead of crowded. After doing this a few times, I started thinking of it less like meal prep and more like arranging flowers.
- Chill your serving table or board in the freezer for 15 minutes before arranging if it's a warm day—this keeps fruit cooler longer.
- Place sturdier fruits first as a framework, then tuck berries and soft fruits in around them so nothing rolls.
- Keep edible flowers out of direct sunlight until the last moment—they fade and wilt faster in heat.
 Pin It
 This fruit table has become my go-to for any celebration because it lets the food be beautiful without demanding anything complicated from me. That's the kind of recipe worth repeating.
Recipe FAQs
- → What types of edible flowers can I use safely?
Choose pesticide-free, food-grade flowers such as pansies, violas, nasturtiums, marigolds, or borage to ensure safety and flavor balance.
- → How should I prepare the fruits for arranging?
Wash all fruits thoroughly. Cut larger fruits into bite-sized pieces or balls using a melon baller, and slice softer fruits like strawberries and kiwis for easy handling and presentation.
- → Can I prepare the fruit table in advance?
Arrange the fruit table shortly before serving to avoid wilting, but you can wash and cut the fruits several hours ahead and keep them chilled until assembly.
- → What optional garnishes complement this fruit display?
Fresh mint leaves and thin lemon slices add refreshing notes and vibrant color contrasts among the fruits and flowers.
- → Are there recommended dips to accompany this fruit arrangement?
For added flair, honey-yogurt or dairy-free coconut dips provide creamy, sweet complements that enhance the fresh fruit flavors without overpowering.