 Pin It
 There's something almost magical about that moment when you bite into a cold dessert and taste two distinct flavors colliding at once—the rich bitterness of coffee meeting creamy vanilla sweetness. I discovered these sandwiches completely by accident while standing in a café line, watching the barista craft yet another vanilla bean frappuccino for the person ahead of me, and thinking how brilliant it would be if that drink existed as something you could hold in your hand. What started as a half-baked daydream turned into an afternoon project that my kitchen still hasn't let me forget about.
I made these for my partner's birthday last summer, and I'll never forget the look on their face when they bit into one while sitting on the back porch at dusk. The kitchen had been hot all afternoon from the oven, but somehow those cold sandwiches felt like the most thoughtful gift I could've offered in that moment. That's when I realized these weren't just desserts—they were an experience wrapped in cookies.
Ingredients
- Unsalted butter: Use room temperature butter so it creams properly without becoming greasy; this is the foundation for tender, buttery cookies.
- Light brown sugar and granulated sugar: The combination creates depth and chewiness—brown sugar alone makes them cake-like, while granulated helps them stay slightly chewy.
- Instant espresso powder: Don't skip this or substitute with regular coffee; the powder concentrates the flavor intensity that makes these cookies recognizably café-inspired.
- Unsweetened cocoa powder: It adds earthiness without sweetness, balancing the sugar and making the cookies look beautifully dark.
- Heavy cream and whole milk: Use full-fat versions for ice cream that actually tastes like ice cream; the fat content is what creates that luxurious mouthfeel.
- Vanilla bean: If you can find it, fresh vanilla bean with scraped seeds is worth every penny; if not, vanilla bean paste works in a pinch.
- Salt: A small pinch in both components enhances sweetness and prevents the flavors from tasting flat or one-dimensional.
Tired of Takeout? 🥡
Get 10 meals you can make faster than delivery arrives. Seriously.
One email. No spam. Unsubscribe anytime.
Instructions
- Get your oven ready and prep your workspace:
- Preheat to 350°F and line two baking sheets with parchment paper so you're not scrambling when dough is ready. This simple step prevents the bottleneck moment where cookies are sitting on counter cooling while you search for paper.
- Cream butter and sugars until they look like fluffy clouds:
- This takes about 3 minutes with an electric mixer and incorporates tiny air bubbles that make cookies light and tender. You'll notice the mixture go from dense and grainy to pale and pillowy—that's exactly what you want.
- Add eggs one at a time, then the espresso and vanilla:
- This prevents the mixture from splitting and ensures even distribution of flavors. The espresso powder dissolves better when mixed with wet ingredients rather than added to dry flour.
- Whisk dry ingredients separately before combining:
- Flour, cocoa powder, baking soda, and salt get whisked together so the leavening agent distributes evenly throughout. Gradually fold this mixture into wet ingredients until just combined—overmixing develops gluten and makes cookies tough instead of tender.
- Drop and flatten dough onto baking sheets:
- Use a cookie scoop or rounded tablespoon and space them 2 inches apart; flatten each one slightly with your palm so they bake evenly. They should be about 1/4 inch thick, thick enough to sandwich ice cream but not so thin they're fragile.
- Bake until edges are set but centers still feel soft:
- This takes 10–12 minutes and is the crucial moment—pull them out when they look slightly underbaked because they continue cooking on the hot sheet. They'll firm up as they cool, ending up perfectly chewy.
- Make the ice cream custard by heating cream, milk, and sugar:
- Combine these in a saucepan over medium heat, stirring occasionally until the sugar dissolves and steam rises—you're not looking for boiling, just the moment before. Add vanilla bean seeds (and the pod) and let them infuse while cooling.
- Chill the custard completely before churning:
- This step matters more than you'd think; warm custard churns unevenly and takes longer. I usually make this the day before and let it sit overnight in the refrigerator.
- Churn according to your ice cream maker's instructions:
- This typically takes 20–25 minutes and transforms the custard into something with actual texture and air incorporated. Transfer to a container and freeze for at least 2 hours until it's scoopable.
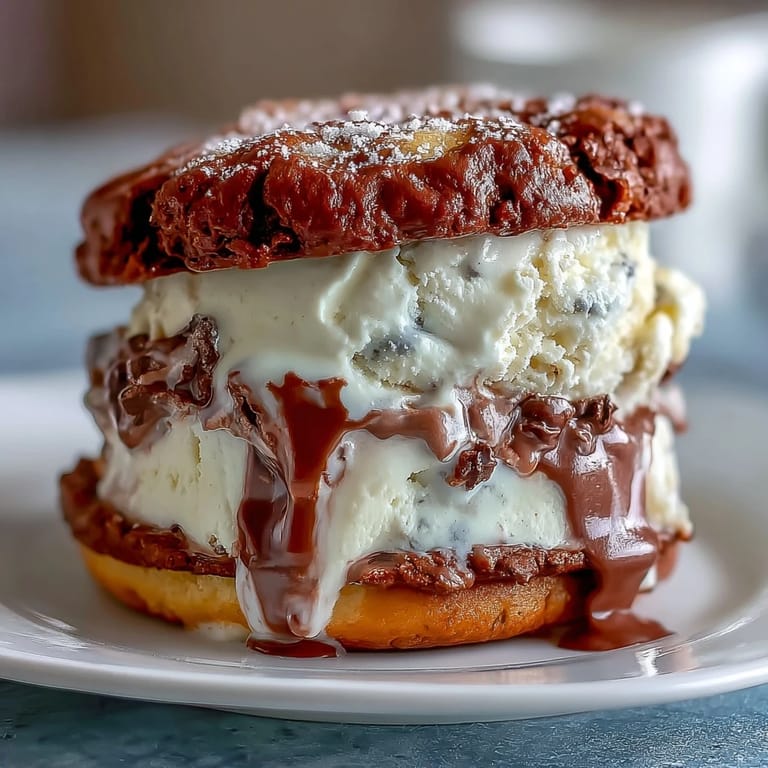
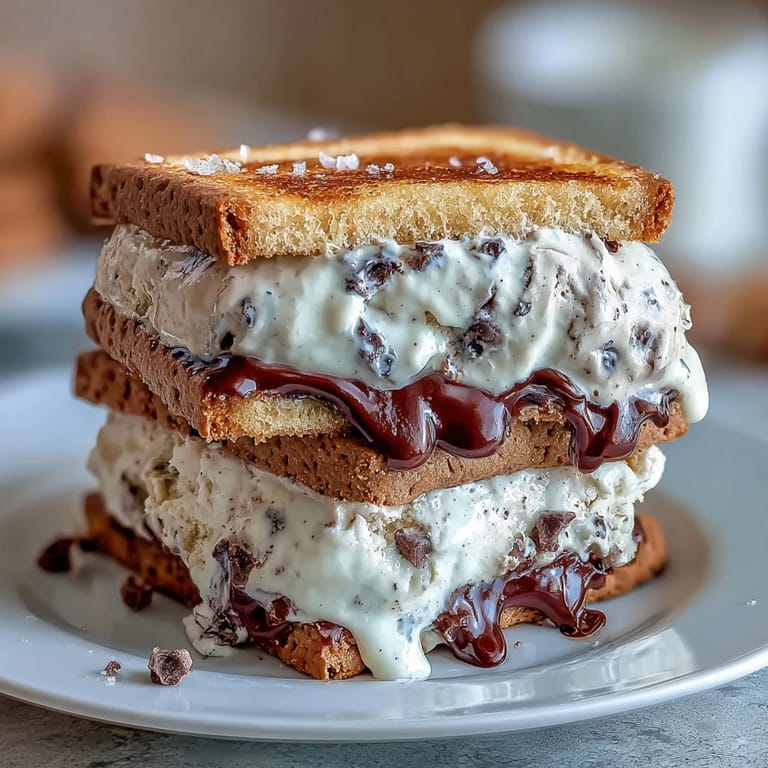
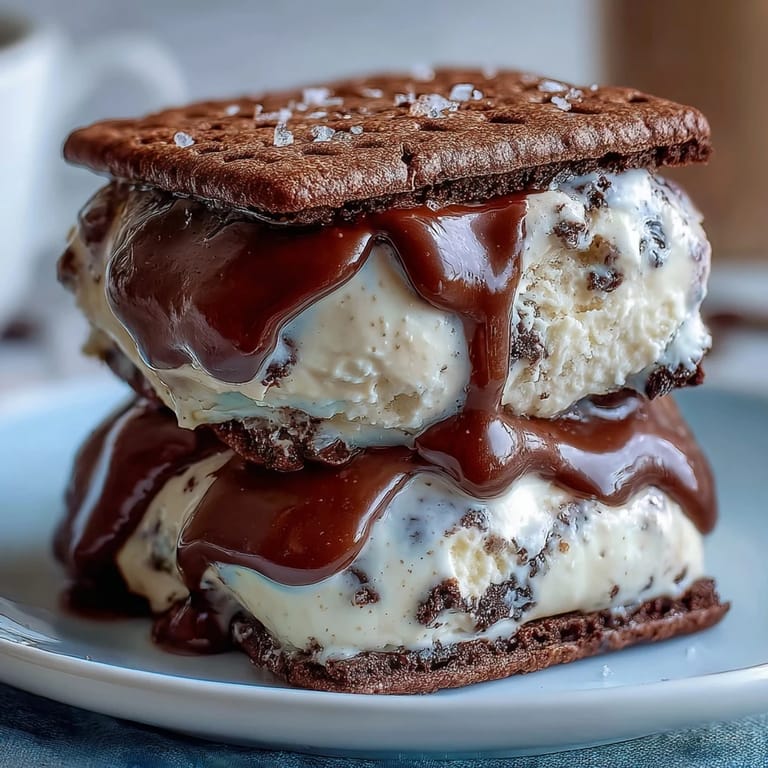
- Assemble by placing ice cream between two cookies:
- Use a small scoop so each sandwich has consistent portions, press gently together, and immediately place on a parchment-lined tray. Freeze these sandwiches for at least 30 minutes before eating so they hold together when you bite into them.
 Pin It
 One afternoon while I was testing batches, my neighbor stopped by and asked what smelled so incredible. When I handed her a fresh sandwich, she closed her eyes like she was experiencing something profound, and I understood right then why people spend money on fancy desserts. Food that makes someone pause and actually taste it is worth the effort.
The Coffee Flavor Profile
The espresso and cocoa in these cookies create a sophisticated bitterness that plays beautifully against sweet vanilla ice cream—it's like the classic café order finally found its dessert form. The first time you bite through, you get that instant hit of coffee, then it softens into chocolate, and finally melts into vanilla. I've learned that this balance only works because the cookies are pillowy and soft; crispy cookies would taste overwhelming instead of harmonious.
Storage and Make-Ahead Magic
These sandwiches are actually better made a few days ahead because the flavors marry together and the cookies absorb moisture from the ice cream, becoming almost cake-like in texture. Store them in an airtight container separated by parchment squares so they don't stick together. They keep beautifully for up to two weeks, which means you can make them on Sunday and have fancy desserts ready for spontaneous moments all week long.
Ways to Dress Them Up
While these are perfect on their own, I've discovered that small additions completely change the experience without requiring much extra work. A quick roll in mini chocolate chips gives you texture and visual appeal, while crushed espresso beans add an intense flavor note for coffee lovers. You can even drizzle melted dark chocolate over them while they're frozen, creating an elegant shell that snaps when you bite down.
- Mini chocolate chips, crushed espresso beans, or even sprinkles can be pressed into the ice cream edges while it's still soft.
- A light dusting of cocoa powder on top mimics the look of a fancy café creation.
- These make incredible gifts when individually wrapped in parchment and placed in a small box.
 Pin It
 These vanilla bean frappuccino ice cream sandwiches became the dessert I make whenever I want to feel like I've done something special without it feeling like work. They're proof that the most memorable food moments happen when you combine flavors you already love into something that tastes like discovery.
Recipe FAQs
- → How do I ensure soft coffee cookies?
Use softened butter and do not overbake. Baking about 10-12 minutes allows the cookies to set but remain tender.
- → Can I make the ice cream without an ice cream maker?
Yes, high-quality store-bought vanilla bean ice cream can be used as a convenient alternative.
- → What coffee ingredient adds flavor to the cookies?
Instant espresso powder is used to infuse the cookies with a rich coffee taste without added moisture.
- → How long should the assembled sandwiches be frozen?
Freeze the sandwiches for at least 30 minutes to firm up and achieve the best texture.
- → Can I add toppings to the sandwich edges?
Rolling the edges in mini chocolate chips or crushed espresso beans adds texture and enhances flavor.